Wednesday, April 17, 2013

Progress

A few weeks ago, some of you may have read my post about my goal of getting fit and healthy. I wanted to give you all an update on my progress, what I have been doing, and most importantly (in my opinion), what I have been eating.

Last week, my husband and I started doing Shaun T's Insanity. My husband had bought the workout DVD's off of Amazon several weeks ago, but we couldn't find the motivation to start until about a week ago. I thought this would be the PERFECT way to meet my goal of trying to be the fittest and lightest I have ever been by the time of my 25th birthday. Since the workout plan that comes with the video takes about 60 days, the timing was perfect! I started the videos about 63 days before my birthday.

The first workout we did was actually a fitness test that comes with the videos. You do this test every 2 weeks to track your progress through the workout plan. After doing the "fit test," I was a little disappointed (and a little happy on the inside). I thought the workout did not live up to the name of "insanity." I thought it was easier than it was supposed to be. However, starting day 2, I needed to recollect my words, because it. was. hard. I was SO sweaty in about 5 minutes after starting. After doing CrossFit for over a year before starting this DVD, I do have to say that if you are looking for a challenging, kick your butt kind of workout that requires no equipment, this DVD set is right for you! After doing the workouts only a week, I know I will see a transformation in the 60 days. I am not sure if I am going to meet my goal, but I am going to do the best I can!

The most important part of this post is now HERE! What have I been eating, you ask? DELICIOUS, HEALTHY FOOD! My husband and I have been eating Paleo on and off for about 2 years. We are not "strict" Paleo-ers, but we do stick by most of the rules.

Basics of Paleo = fat is not what makes you fat + sugar is what makes you fat = anything that breaks down into sugar in your body also makes you fat = starchy carbs are what make you fat.

The main items that make you fat include the following: bread, noodles, rice, bananas, corn, sugar, any artificial sweeteners, honey, etc. We will use honey or stevia, but even these items can become the equivalent of sugar in your body. One of my favorite explanations of this is found on one of my favorite go-to websites for Paleo recipes.

So basically, because my favorite food items to eat include noodles and rice (I am Italian and any Asian on the inside), my whole world was rocked by switching to this diet. I whined and complained to my husband because all I wanted to do was cook curry with rice or some kind of pasta dish. I was ridiculous! However, now things are different. I actually do not even like the taste of rice dishes or noodle dishes. I SO prefer my Paleo versions of these items. My Paleo "rice" will never let me down, along with my "zoodles" or spaghetti squash noodles. The best part about subbing these things for starchy carbs, is how you feel AFTER you eat! You feel like you didn't eat anything, although you are full. When I eat meals with lots of starchy carbs or bread, I feel like I ate an elephant that is growing inside me (talk about gluten belly - if you don't believe me, google it and look at the images!).

Anywho, our diet has flipped a 180. We were eating out MOST of our meals, whether I was eating lunch at work, or my husband going to get Zaxby's for lunch at work, or I was swinging by Five Guys or Panda Express several nights a week on my way home from work. This is just sick. Our bodies were not made to eat such processed, nasty CRAP.

I have actually been making breakfasts, coming home from work and COOKING (I couldn't believe it either!), and preparing food in advance to set ourselves up for eating success!

Here is a look into our world of eating....


Paleo Chicken Fingers with Sweet Potato Curly Fries


Feta Steak and Arugula Tacos (Yes, I could be on the creative team of Torchy's Tacos)


Steak Avocado Omelet


Pot Roast over Cauliflower Rice with Paleo Mushroom Gravy (this gravy was to DIE for)


Egg Sausage and Avocado Scramble


Chicken with Artichoke Mushroom Gravy and a Baked Sweet Potato


Breakfast Burrito


Homemade Tuna Salad over a bed of Greens with my version of Tre Colore Pesto as dressing


SO Coconut Yogurt with Fresh Blackberries, Raspberries, and Walnuts


My Version of Paleo Pizza (SO freaking good)


Recipes are linked if you are interested. A lot of this is just from my own head, so if you have any questions about recipes, don't hesitate to ask. I will definitely do a post about Paleo Pizza and that Mushroom Gravy soon. They are both crazy good!

I am going to go enjoy the weather now. You kids be good and eat good! :)

Tuesday, April 2, 2013

Creamy Sage Rutabega Soup (Paleo)

I hope everyone had a happy Easter Sunday! I actually had the weekend off, so I got to enjoy being with my hubby and his family. Most of my family is out of the country right now, so I was not able to see them. We had a pretty packed weekend; going to a wedding and a fundraiser dinner for a local clinic that does indigent care. We had a blast getting all gussied up in our best evening wear and hitting the town every night.

Unfortunately, Friday night I started to feel a little on the sick side. My throat started hurting, which quickly progressed to a lovely sinus headache, which then became a nasty cough. The only thing I wanted to eat this weekend was something warm and savory.

My need for comfort food finally forced me into making something I have been wanting to make since my trip to Portland, Maine in the fall. We went to this FANTASTIC restaurant called Duckfat when we were there. Let's just say after I tasted my appetizer I proudly announced to the table, "if the chef and I made babies, we would have the most famous culinary children in the world," which then led to a hot debate on artificial insemination that ended poorly.

ANYWHO, the food was fantastic to say the least. The most famous item at this restaurant was the fries fried in duck fat. They also had a variety of sauces to dip the fries in. The sauces were stellar! Like I said, the chef and I were totally on the same palate train!

The appetizer that I had that really blew my socks off was a Sage Rutabega Soup. The tastes were perfect, from the salty bacon, to the savory and sweet spices of cinnamon, nutmeg, and sage, to the bitterness of the rutabaga, to the creaminess of the whole thing. Yep, it was perfect. I was so intrigued that I asked the waiter how the dish was made. He went back to the kitchen to give me the full report. We mentioned what ingredients were in the dish, and I just knew I had to come home and try to recreate it!

This is what I did....

Juju's Creamy Sage Rutabega Soup


Ingredients:
2 rutabega, ends sliced off and peeled then cubed
4 strips of bacon, sliced
1 yellow onion, chopped
5 large cloves of garlic, minced or pressed
1/2 cup white wine (I used Chardonnay)
4 cups chicken broth/stock
1 1/4 tsp nutmeg
1 3/4 tsp cinnamon
1/4 tsp ground ginger
~3 tbsp packed fresh sage, rolled and sliced
~1 tbsp fresh thyme leaves
1 cup coconut milk creamer (SO brand is what I use)
Salt and Pepper to taste


Directions:

Get all our ingredients chopped up and prepared. If you prepare before you begin cooking, you won't overcook your food while you are trying to chop something up.


 Get out your dutch oven (or whatever you make soup in will work). Turn your stove onto medium heat. Be patient and wait for the pot to actually heat up before adding your ingredients.

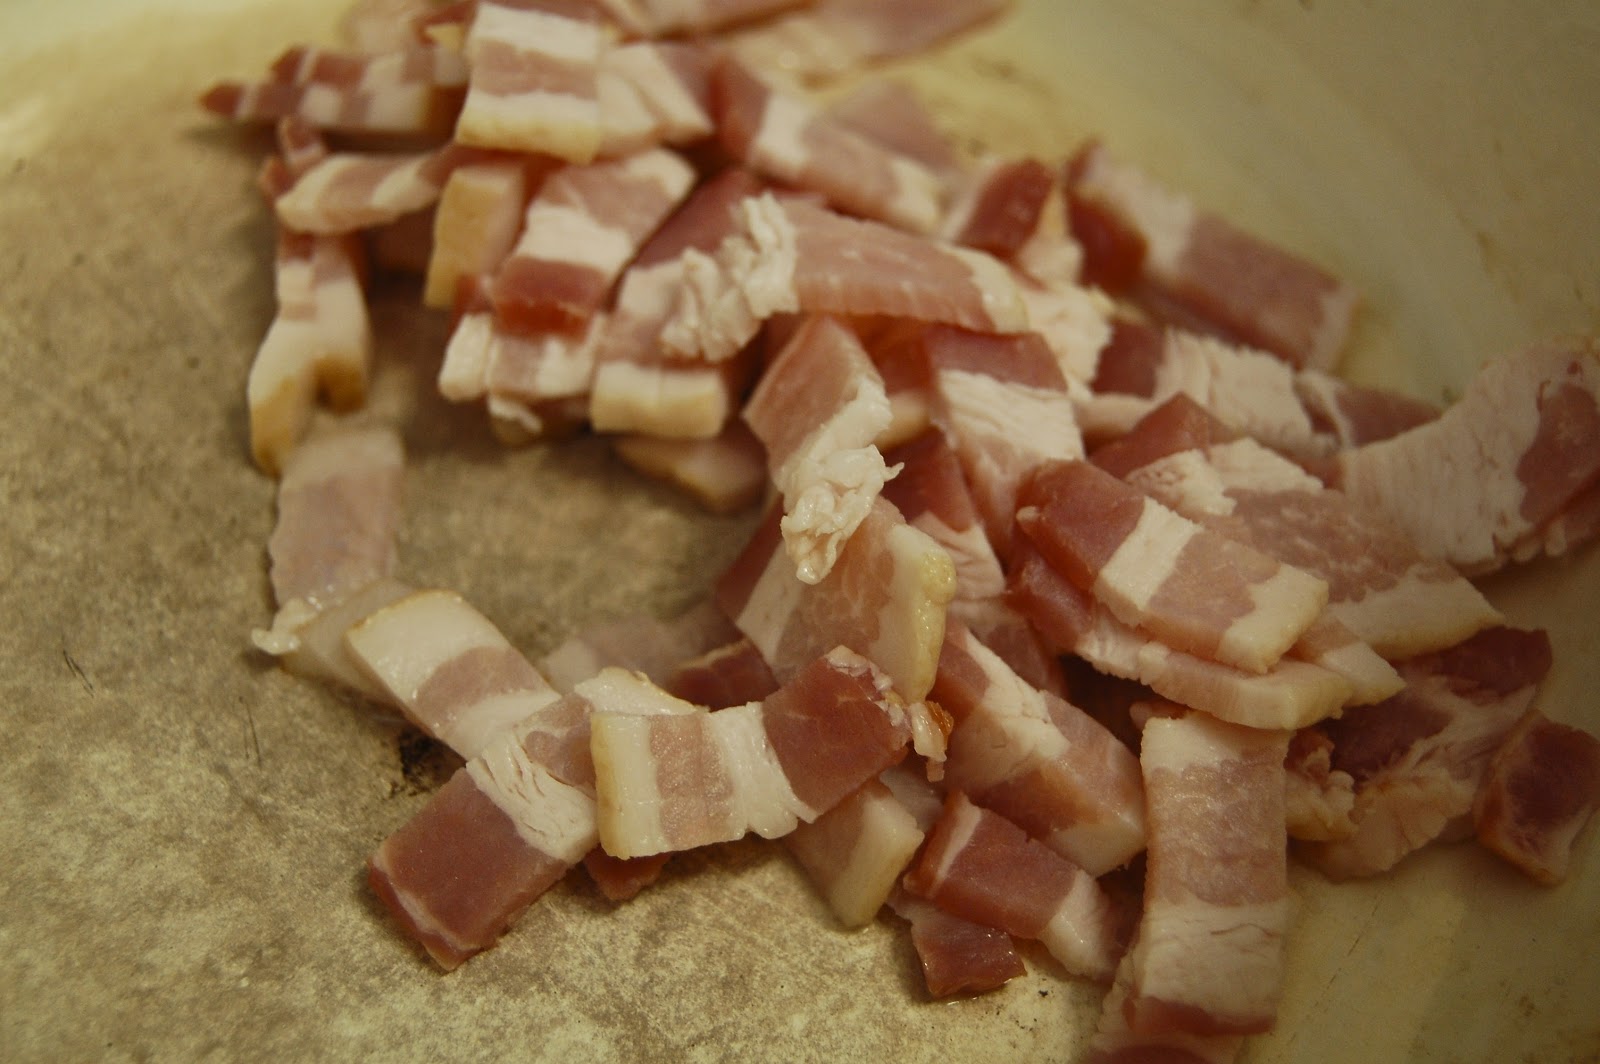
Once your pot is warm, add in the sliced bacon. Ahhh! Nothing better than the smell of bacon!


Let your bacon brown up. Make sure they don't burn! We want the pieces to be nice and crispy, but not burned! You will notice that as the bacon browns, you will get a nice brown film to the bottom of your pot. Leave it there! We will use this "secret" ingredient in a second!

Once your bacon is nice and crispy, remove ONLY the bacon from the pan, leaving as much oil behind as you can. I put my bacon on a plate with a paper towel to let the oil drain off the bacon pieces.

Once you have removed the bacon ONLY from the pan, add your onions to that bacon fat! Then add your garlic. Your pot is going to be hot at this point so you must stir up your onions and garlic to keep them from getting too brown at once or sticking to the bottom of your pot. Don't let your garlic burn or stick to the bottom! It will make it bitter and yucky!
As you stir, enjoy one of the most delightful scents in the world - onions. garlic. bacon fat. YUM!

At this point you can add some salt and pepper. My methodology with salting and peppering is when you add something to the pan, add a little more of both. If you start early, you won't be behind on the salt and pepper train once your dish is cooked. If you are uneasy about your salting and peppering abilities, save it for last, as you can add a little at a time to your own taste, without overdoing either.


Without burning either your onions or garlic, brown these delicious morsels until they are a nice golden brown and soft (see photo above). Turn down your heat a little. 
Once you reach this phase, add your white wine.
Some sizzling is going to happen at this point!
Stir, stir, stir. Turn your heat down so that your wine is simmering, not boiling.
See that brown film on the bottom of my pot in the photo above? Remember how I said that this film was important? After you add your wine, you are going to "deglaze" your pot. Use your spoon/spatula to scrape all that crap off the bottom of your pot. This stuff adds a lot of flavor to your food. The more flavor, the better.
Let your wine simmer for a few minutes.
Then add your cubes of rutabega.


Add some more salt and pepper at this point (if you want). Let your rutabega sit in your wine hot tub for a few minutes, stirring occasionally. 
Then, add your chicken stock. 4 cups is equivalent to one of those boxes in the store.

Cover your pot and bring your liquid to a boil. This might take awhile.

Once your rutabegas are boiling, add all your spices and stir it up. Cover again and let it boil until the rutabagas are fork tender. Add salt and pepper to taste.

Once the rutabagas are tender, you can now make a decision based on what equipment you own.

1. You can eat as is.
2. You can use a hand blender in your pot to make soup creamy.
3. You can put several portions of the soup into a blender to make it creamy.
4. You can add several portions to your food processor to make it creamy (this is what I did).

Once you pulverize your soup, add in your coconut milk creamer.
If you do not eat Paleo or do not care to eat Paleo, you can sub the coconut milk creamer for heavy whipping cream or half and half. However, the coconut creamer is actually not bad for you.
If you do eat Paleo, you can sub creamer for regular coconut milk in the can. If you want the soup to be thick and creamy, use the top of the cream and not the watery part.

After you make sure the soup is heated through after adding your cream, you are done!

Serve in bowls. Top with your bacon bits and extra sage!

Enjoy!!

And for your viewing pleasure...


Me crankin' out some garlic! Photo courtesy of my favorite taste tester who loved the soup! :)


Monday, March 25, 2013

Challenges

Lately, I have been struggling to maintain my health and weight. It stinks to realize that you are no longer that 17 year old that can eat whatever you want and never worry about how your clothes fit. Since we have been married, we have gone back and forth with our weight. In the last 4 years I have been the heaviest I have ever been, and I have also been the thinnest I have ever been. We are clueless when it comes to maintenance. I think it is partly my fault. It is so hard to maintain anything when you don't have a set schedule. Then I started school and practically everything has fallen apart.

About a year and a half ago, I was smaller than I was in high school. Not that being skinny is everything (because it isn't), but maintaining a healthy lifestyle IS important. This lesson I learned one night at work. My husband had started doing CrossFit, but I refused to do it with him. I made excuses for myself, such as I worked night shift so why would I ever want to make my life any worse by exercising. Yep, I was pretty terrible. I also said I could eat anything I wanted since I had to suffer so much with working nights. I was pretty ridiculous. One night at work though, I had a revelation. I was sitting there doing my charting when I realized that if I didn't change my ways and keep making excuses, I was going to end up just like all the people I was taking care of. Once you see the horrors of what chronic illnesses can do to a person, you think hard about all of your own poor lifestyle choices. Some things are not what they are cracked up to be (bad foods, laziness, sedentary lifestyle, etc.). It was then that I decided I would come off of night shift ASAP, and start to exercise.

I got off of night shift and my husband ended up talking me into joining CrossFit. I was so hesitant at first after hearing all of his stories about how hard the workouts were. I was scared I was going to be weak or get hurt (but I think it was mostly my pride I was worried about). I started going, and yes, the workouts were extremely hard, but I could do them. Yes, I was weak, but I became stronger. The people there were so amazingly encouraging. I would call it encouragingly competitive. It was your classmates who kept you going, not because you had to beat them or show off, but because they told you that you could do it. It was amazing to see how you could push your body past the limits of what you thought you could do. I will never forget the first time I did ONE pull-up! I know that sounds silly, but you go try one! I will also never forget the time I did my first rope climb. I wished I was back in elementary school. The coolest kids were always the ones who could climb the rope to the top in gym class, right?! :)

When I started school last fall, it was really hard to keep up with going to CrossFit. The gym that I went to was small, and classes were only offered at certain times of the day. I was going to the 7am class on my days off and I was already struggling to go. Once school started, I really wanted to use my off mornings to catch up on rest, so that I wouldn't be falling asleep while reading my textbooks all day. So I quit going and stopped my membership. Lately, I have been desperately missing it! I miss the workouts, the people, the HIGH (OMG those workouts would make your endorphins do some crazy things!). You would feel SO good, SO accomplished after a workout! I always left feeling like my heart was beating stronger and that my lungs could breathe deeper (I know that is strange, but it is true!).

Ever since I quit I have been trying to exercise at home. Before winter hit, I was trying to run outside. I did it sometimes, but not consistently. Once it got cold, I purchased the Jillian Michaels video to keep me moving. I did it some, but haven't kept up with it.

The other night after picking up Five Guys after work for dinner I told my husband, "This has GOT TO STOP!" I am serious about this. My family has GOT to be healthy and maintain a healthy lifestyle!

I have challenged myself to lose 10 pounds by the time we go to Austin to visit our best friends in May.

I know that sounds like a lot, but my goal weight is actually 20 pounds lighter than what I am now. I know that sounds crazy, but it is possible because I have been that size before and it was the best shape I had been in in my life.

My long-term goal is to be at my goal weight by my birthday in June. I want to be in the best shape of my life when I hit 1/4 of a century old! I know I can do it!

One of my favorite things I have pinned on Pinterest is this little reminder that I have SO much control of my health...

Via http://foodnfitnessjunky.wordpress.com


This is SOOOOO true! Luckily, I have 99.999999% control of what is made in my kitchen. What a blessing it is to be in control of the health of my family. It is also a huge responsibility that I will no longer take for granted! These abs are about to be MADE over here in THIS kitchen! :)

I am also going to start exercising on a regular basis. I started today and went for a run around a little pond here in town. Sadie was absolutely thrilled to get outside. She is now pooped, because our little run actually turned out to be an ordeal. I attached (not very well) my clicker to get inside my car to the zipper of my jacket. It ended up falling off during the run. I didn't notice until we were at the car trying to get in and the ring attaching the clicker to my jacket was empty (whomp whomp). We did the whole loop again backwards and walking searching for the clicker (blind without my glasses no less). I called my in-laws to come rescue us about half-way around the loop. When they arrived I looked down and there was my clicker! Long story short, I pretended to lose my clicker so that I could see them, or at least that is what I said. ;)

I will keep you guys updated on my progress. I have lots of healthy food already in the fridge, I just have to actually make it! I will post any delicious, healthy food I end up making. If you are interested in any of the websites I use for recipes, they are listed in the right column under my favorites. If you have any tips on running or exercise or recipes or what helps you stay healthy, PLEASE let me know. I also am now in the market for a pair of workout pants that have a small key pocket, so if you have any suggestions let me know. :)

Friday, March 22, 2013

Gel Nail Update

Sorry it has taken me so long to follow up with everyone about my D.I.Y. gel nail experience. I wanted to just let you guys know how long the paint lasted on my nails and how everything held up.

This picture was taken a week later.

The only chip is the right side of my middle finger. The chip happened because my nail actually broke right where the chip is. The biggest offense to the polish was when my nails would break. I am not sure if the polish weakens your nails, or if I have easily broken nails, because I don't ever have long nails!

The polish went through a lot that week. I think washing dishes and the hand sanitizer I use at work is what takes off normal polish. This manicure lasted through a weeks worth of washing dishes and several days at work, constantly exposing my nails to harsh chemicals with the hand sanitizer.

I ended up peeling the polish right off shortly after this picture was taken. I did not even use nail polish remover.

Overall, I think the D.I.Y. gel nails are definitely worth the time and money! They didn't last me 2 weeks, but in reality, the gel part of the manicure was less than $5. You cannot beat that!

Hope you guys try it out! You will not regret it! :)


Tuesday, March 12, 2013

D.I.Y. Gel Nails

I know you all are sick of me posting about the crockpot. I decided to give you a break from food and go a totally different route today.

Have you guys ever gotten a shellac or gel nail manicure? I have seen so many people getting them lately! I never really paint my own nails, because 1.) I am TERRIBLE at being a girl, 2.) I cannot paint them without messing them up, and 3.) In a few days, they look like I put my fingers in acid or something. Once I started seeing people get these gel manicures though, I thought, "I totally could put up with that, it makes your nails SO pretty!" They stay nice for so long, and the polish looks so professional! Then I found out how much it costs... about $30 per manicure is what I have heard from friends. I am way too cheap for that! I will barely get a pedicure because it is also that expensive. I do not know how people can afford to get pedis and manis every month! You can also buy a kit to do your own gel nails at home that has the lights and everything. They start around $50 from what I have seen. I still couldn't cough up the cash for such an extensive set.
So I started having an issue...how was I going to get my beloved gel nails without breaking the budget?!
I started searching Pinterest (of course!) for a solution to my problem. One day, I ran across a pin about how to do a D.I.Y. gel nail mani at home! I found this girl's blog and she told me exactly what to buy and what to do. Here are some props out to her at Yours Truly for posting such a great post! Here is the original post. I also searched the web for how to do a proper manicure. I found a video about how to get a professional looking manicure at home. I combined this video with the post about gel nails to get the perfect gel nail manicure!

I am going to show you what I used and what it costs to get this type of look in your own home, so that your manis stop breaking the budget!

I started this adventure by going to Sally Beauty Supply. I have never been in this store before; it was an experience to say the least. It is filled with everything that it takes to be a true woman. I even told the gal at the cash register that I was now officially a GIRL for coming to this store.

I had to buy several items because my manicure kit at home was very lacking. I ended up buying the following...
1.) Nail buffer ($2.49)
2.) Pure acetone (I tried to buy the kind that is easiest on your nails and skin because I know how harmful it can be) ($3.49 originally, but it was on sale for $2.49)
3.) Glass nail file ($7.69... I know it was expensive... I think it was worth it, though)
4.) Gelous nail coat ($5.99 originally, but it was on sale for $4.49)
5.) Out the Door top coat ($5.49)

Then I went to Target and found everything else I needed...
1.) Sally Hansen's Instant Cuticle Remover ($4.99)
2.) Target brand angle brush ($2.29)
3.) Cuticle sticks ($0.89)

I already had regular polish and regular nail polish remover at home.


This is everything you need!

Now that I had bought everything, it took me awhile to set aside the time to do this manicure! I was looking forward to doing it on my day off, but I didn't have time and then we went out of town and then I had to go back to work. I finally got to try everything yesterday on my day off!

I started by filing my nails while my old polish was still on. I was told to do this so you can get a nice, even nail. If you look at the white part of your bare nail as a guide to get an even nail, you might get a crooked nail line because the white part isn't square to your cuticle. I used the Emery Glass nail file, and I loved it! It is worth the money in my opinion. After I got my nails filed and got the dirt out from underneath them, I started taking my old nail polish off with regular nail polish remover. Once the polish was off, I squirted some of the cuticle remover to each cuticle. I left it on there for about 20-30 seconds. Then I used the flat end of the cuticle sticks to push my cuticles back and get rid of them. Then I washed my hands with soap and water so I could start painting!

I started by using the Gelous Nail Coat. I did one coat and then let it dry before doing a second coat. Once the second coat was dry, I got out my regular nail polish (Fearless Fog by Sally Hansen) and did one thin coat. Once I waited for that to dry I did another gel coat. After that dried, I did one last regular polish coat before applying my top coat.

After my top coat dried, I got out a small glass mixing bowl (behind all the supplies in the picture), poured some acetone in its own cap, and placed it in the bowl so I wouldn't spill it. I got out my angle brush to clean up any mess around my nails. After dipping the angle brush in the acetone, I swept around the edges of my nails for a nice, clean edge. You can also use this technique for the back of your nail (where the cuticle is) to make a gap between your skin and your nail. I didn't try this technique this time, because I was afraid I would mess up my nails, and they (for once) looked so good! I was chicken, but I will definitely try it next time! The angle brush is way better than using just Q-tips to clean up around your nails. It is like using an angle brush to trim around the ceiling when you paint a house... it makes such a clean line. After you clean up the mess, you are done!!


So far, I LOVE it! I haven't officially totaled it with a calculator, but I ended up spending around $30. It is about the cost of a professional gel nail manicure, but now I can probably do about 200+ manicures for the same price at home! I am going to be posting an update about how the manicure is holding up from wear and tear. So far, it is totally worth the money. It has been a day now, and so far there is not a single smudge or chip (I usually have all sorts of mess ups already!).

I will update you how it is in a few days! Happy nail painting! :)


Monday, March 4, 2013

Juju's Crockpot Rye Corned Beef and Cabbage


Time for ANOTHER crockpot recipe!

I pretty much use my crockpot 3 times a week nowadays, but I have come to the point that I am experimenting. I am pretty sure this is one of my fortes, only because I am not afraid to try interesting things (which most of the time comes out to be yummy!). I can remember coming up with this one recipe using boneless pork chops when I was in college (I am sure I made my roommates try a bazillion different weird recipes!). One day I made it back at my parents' house. One of the ingredients was brown sugar, and instead of adding what I thought was brown sugar, I accidentally added cocoa powder! As soon as I added it, I KNEW I had added the wrong ingredient. I thought about trying to scoop out all the powder that had piled up on top of the chops, but I thought... now that may actually taste good...! I went with it, and it was actually fantastic!!

Side story over... sorry about my ramblings.

Another reason why I have been making so many crockpot recipes, is that I was inspired by a blog that I read called Peanut Butter Fingers. I found this blog on Pinterest, because this girl posts her outfits and where she buys all her cute clothes! Since I am in DESPERATE need of fashion advice, I started reading her posts on a daily basis. I love that she also posts recipes and workouts (and she also has a dog named Sadie that is the exact color of my Sadie). She started a Crockpot Challenge Month with other bloggers by making crockpot recipes through the month and posting the best recipes. I actually made her Crockpot Curried Lentils and it was DELISH! If you want to check out her recipes that she made during the challenge along with a list of the blogs that participated in the challenge, you can click here. 

Anyways, one thing I now LOVE to make (mainly because I love to eat it, thanks to my friend C.C. who I don't want to name for privacy sake) is corned beef and cabbage! It is SO good with so many different spices and tastes, and it is perfect for cold, winter nights!

When I first had it when she deliciously made it, she had a pretty complicated (in my opinion) recipe. She put all her spices in cheese cloth and all sorts of fancy things! 

Once we ate her DELICIOUS dinner she had made, I went home thinking, "I HAVE to make that myself!" 

So, just in time for St. Patty's Day, here is a super easy, tasty version of my crockpot corned beef!

Juju's Crockpot Rye Corned Beef and Cabbage

What you will need:
A crockpot... and a liner if you so desire

Ingredients:
1 slab of corned beef (choose your size)
Packet insert*
1/2 cup rye whiskey
1/2 head of cabbage
1 yellow onion
2 cups vegetable broth
Salt and pepper to taste

*Every packaged corned beef I have ever bought at the grocery store has had a packet of spices that comes inside the package with the meat. I just use that packet for spicing and it works well and it is easy!

Directions:
1. Get out that bad boy crockpot! Line it if you don't want to build some muscles later.
2. Open your package of corned beef and throw it in the pot. Make sure you put the package insert of spices to the side. We will open those and use them in a minute.
3. Cut up your onion. I quickly slice it up because I am lazy and don't want to dice it.
4. Cut up your cabbage. You can use the whole head if you want to. I chop it into big chunks. It will cook, so don't worry about them being too big.
5. Add your broth/stock and whiskey to the pot.
6. Add your spices. Just throw 'em in there!
7. Add the onion and then the cabbage. 
8. Season with salt and pepper now, or add it at the end (remember, corned beef is already salty, so add it a little at a time to taste).
9. Turn on your crockpot, put a lid on it, and cook for 8 hours on low.
10. EAT IT UP


Tuesday, February 26, 2013

Juju's Spaghetti Squash Cream Pesto Pasta

Wow! That title is a mouthful! 

I was inspired for this dish by a photo that I saw on Pinterest. It was called Spaghetti Squash Parm. 
Um. Hello! Sounds delicious!! 
Unfortunately for me, I could not trace the picture back to the link.
Fortunately for me (and for you), I have created my own! :)

Equally inspiring in this feat, was a little friend I like to call..


When weather is bad, the AeroGarden always saves the day! 
I received this as a gift from my mother-in-law. These are about the only plants that I can keep alive in my life. I love this thing dearly, because you can have fresh herbs in your dishes without the substantial mark up at the grocery store.

Any who, I needed to use up a LOT of basil. So I thought, hm....
I could make a pesto!
So that is exactly what I did after I trimmed all the basil.
Trimmed a LOT of basil.

So here is where this recipe gets complicated. I am going to separately explain each element that I made, because at the end, you put them all together to create this fantastic dish!
First up... 

Spaghetti squash noodles:


I started using spaghetti squash as noodles after we went paleo. It took me awhile to start using them because I had heard so many people that eat paleo complain about how boring the noodles are.
I am here to tell you that that is not the case!
It's what you DO with them that makes them not boring!

To make spaghetti squash noodles all you need is a spaghetti squash and some EVOO.

I preheated my oven to 425 degrees.


Then I chopped this bad boy in half hot dog style (yes, I am in first grade).


Starting in the center, take your knife and start slicing towards the end of the squash. Although it looks and sounds easy, it is not. I should have included a video of me BANGING my knife through the squash. I can only imagine what you would think.
Whatever you have to do to get this thing sliced, do it without reserve. Just please, be careful not to cut yourself or anyone else!

Once you get your squash cut in half you will see this...


See all that pumpkin inside looking stuff in the center? Like a halloween pumpkin? Take a spoon and scoop out the seeds and some/most of the pulpy inside. You do NOT have to be perfectionist on the pulp. This stuff will not be any different than the actual meat of the squash once it is baked.

Now that your oven is preheated and you haven't cut your finger off, place your squash on your stone or baking sheet, meat side up. Drizzle flesh with EVOO.

Turn squash over so that they are skin side up. Put in the oven and set your timer to 30 minutes.

If you are just using this recipe for making these noodles I will go ahead and finish with after you take your squash out of the oven.

Just a warning, they will be hot!!

Flip each squash over and get out a regular fork.
Using your fork, scape out the meat of the squash. As you start to scrape you will notice that it comes off in strings. These are your noodles!


If you are making this dish, while your spaghetti squash is in the oven, you can start making your...

Cream Pesto:

For the pesto, you need the following:

2 cups basil (I used 1 cup lemon basil and 1 cup globe basil)
1/2 cup walnuts (pine nuts are too expensive!)
2 Tbsp EVOO
1/2 cup coconut creamer (My FAV item at the grocery)
1 lemon, juiced
4-6 cloves garlic (I am OBSESSED with it so I do 6)
1/2 cup parmesan cheese, shredded
salt and pepper to taste


Put your basil, garlic, and nuts into the food processor and turn it on until fine.
With the processor on, drizzle in EVOO using the spout on your processor. 
Scoop out your mixture into a mixing bowl. Whisk in coconut creamer and lemon juice.
Add a lot of salt and pepper! Do it to taste, but I found that the more I added the better and more pronounced the flavors were.
I found this sweet spot where if you add enough salt, it REALLY brings out the flavors of the garlic and the fresh lemon juice. I included a picture so that you would know I meant a LOT of salt and pepper. Now add the cheese and mix well.


Once this is all mixed up, your pesto is done and ready to be added to the pasta mixture at the end.

Veggies/Meat: 

For the rest of the pasta, you can add your own veggies according to what you like. This is what I added...

1 red bell pepper, sliced
1/2 green bell pepper, sliced
1 purple onion, sliced
1 box portabella mushrooms, sliced
1 jar artichoke hearts, cut in half (so tasty)
1.2 boneless, skinless chicken breasts, cubed small

After everything was chopped up, I drizzled some EVOO into a large non-stick skillet on medium-high heat.
First I added my chicken until cooked on the outside (once it was white on the outside). This dish would still be awesome without chicken (just a hint for all you vegetarians out there).

Once the chicken was white, I added in the onions. 


I cooked these for a few minutes before adding the bell peppers. I cooked the mixture until the bell peppers were almost done (soft enough) before adding in the mushrooms. 


Once the mushrooms were soft enough, I poured this mixture into a side bowl. 
By this time, my veggies were done, my meat was done, my pesto was made, and the timer for my spaghetti squash had gone off. Now, take a fork and scrape out the inside of your spaghetti squash if you didn't already do that while everything was cooking up. Add this back to your pan on low heat. 
Add the veggies/meat and stir it all up.
At this point, I decided I wanted the dish to have an extra kick, so I added about 1/2 Tbsp of crushed red pepper flakes. It was spicy so only add it if you can handle it!
Now add the pesto to everything. Mix it up REALLY good so that everything is coated in the pesto cream mixture.
Make sure everything is heated through before you serve!


This is where I tried it, and LOVED it! 
I topped off each portion with a little parm for fun!
This is the kind of meal that reminds me why we went paleo. It also reminds me of why I don't consume noodles anymore. It really is that delicious.