THE BUTTERNUT SQUASH

Now that it is fall, we all want to feed our faces with our favorite fall foods. Soups, stews, and pot pies, are now what dances in our heads when it is dinner time.
Also, for some reason, we want to eat anything that is pumpkin flavored.
Pumpkin donuts, pumpkin cupcakes, pumpkin coffee, etc.
Recently, the grocer man has been giving us some alternatives to just cooking with
cans of pureed pumpkin.
He has been busy stocking up some butternut squash!
(F.Y.I. My favorite farmer/my farming mentor once told me that all pureed pumpkin from a can is..... is BUTTERNUT SQUASH! Who would have thunk?)
Anyways. I have been craving some butternut squash soup. Instead of using a recipe from online, I just thought I would try whipping some up on my own! Besides, it gave me an excuse to use one of my most favorite things in my kitchen...
THE DUTCH OVEN
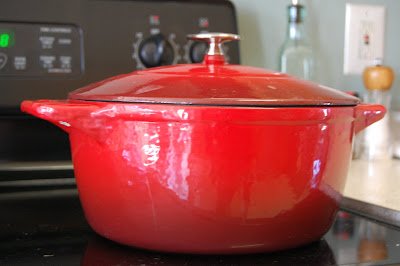
Isn't she perrrtyyy?!
So, I got to business this morning. As follows is the recipe and what I did to make this fab soup!
Juju's Butternut Squash Soup
Here's what you're going to need...
EVOO (extra virgin olive oil -> for those of you who have been living under a rock)
1 large butternut squash, peeled and chopped into bite-sized cubes
1 yellow onion, chopped
3 large or 4 small cloves of garlic, minced
1/2 granny smith apple, chopped (I am sure another kind would be fine if that's what you got)
1 tbsp fresh thyme, finely chopped
1.5 tbsp butter
1/2 cup brandy
4 cups chicken stock/broth (a carton)
2 roasted red bell peppers (the ones in the jar)
1 carton SO Delicious Coconut Milk Creamer (make sure it's the ORIGINAL kind)
Nutmeg
Cinnamon
Cayenne Pepper
Salt
Pepper
First off, I got all my veggies chopped so that I could be ready. Don't worry about chopping everything perfectly, it's not worth it in the long run. We are going to puree this in the end.

After getting everything cut up and peeled, I got my dutch oven out, drizzled some EVOO liberally in the bottom, and turned my stove on to medium heat.

Once the oil has had a chance to heat up, add garlic. Let it simmer in here until it gets yummy smelling. This takes about a minute. Stir while it's sizzling, you don't want the garlic to burn.
Next, add the onions. Stir this stinky combination until onions are soft. This may take a few minutes. Again, don't let the garlic burn!
Now add the butternut squash. Stir the mixture up a bit. This is where I let everything sit and mingle. I put the lid on for a few minutes before checking on them. Occasionally take your lid off and stir. The squash should release some juices, so you don't have to worry about burning the food. Let this cook so the squash can soften up a bit (about 10 minutes).
Now add your butter, apple chunks, and thyme.
Keep on letting everything sit and mingle, stirring on occasion. While my pot was cooking up, I was making myself busy with other things. Don't worry about it too much!
After a little bit of time, this is what my mixture looked like.

Once everything is soft and mushy, add some cinnamon. I added 2 pinches at this time, but then I added 4 more pinches at the end for taste. Also, add salt and pepper in there according to taste.
Once you add your cinnamon, this is when you start smelling those apples! Sooo good!
Using a microplane, grate your fresh, whole nutmeg to where the mixture is dusted with yummy nutmeg powder. Nutmeg is always a great secret ingredient.
Now that your pot is smelling like fall, add your brandy.
Let the brandy coat your mixture as the alcohol burns off. Also, make sure you're scraping the bottom of your pot at this time. Get all those yummy crumbs that are stuck to your pan!
Once you give the brandy a few minutes to burn off (your liquid should just about reduce in half), add your chicken stock. Once you've added your stock, put the lid on your pot and go find something else to do! You want your soup to come to a boil, and this might take a few minutes.
Once you get your soup mixture up to a boil, let it stay there a little bit. Add your roasted red bell peppers at this time.

I know, it's not the most beautiful looking creation, but it gets better from here. If you have a food processor or blender, follow my instructions from here on out. If you have a hand held blender, you can use that right in your soup pot!
Once everything is nice and steamy and boiling, dump your soup into another vessel. I used my large mixing bowel from Pampered Chef. If you use something that is glass, it might crack, so be careful! This is some hot soup!
Get our your food processor/blender. I used the biggest blade for this job. Using a ladle, fill up your food processor about 1/3 of the way with your soup.

Let her rip!
Turn on your food processor until WELL pulverized!
If done correctly, your soup should now look like baby food/applesauce.
The more you blend, the better the texture of the soup will be.
Once your first round is done, dump your baby food back into your original soup pot.
Repeat until all soup is pulverized and back in your original pot.
Here is what your baby food should look like...

Almost there!
Okay, this is when I started to add my spices to taste and add my creamer. Once I got to this point, I had only added 2 pinches of cinnamon. When I say a pinch, I literally mean a pinch (between your thumb and index finger, people).
At this time I added a total of 4 more pinches of cinnamon and about half the amount of cayenne pepper. I would guess about 1 tbsp cinnamon and 1-1.5 tsp cayenne pepper in all. This is also based on personal taste! I like spicy, but you may not, so add a little at a time, stir it up and taste it. You will know when it is just right!
I also started whisking in my coconut milk creamer at this time. This is to help the soup be creamy, instead of baby food texture. I used almost a whole carton of this stuff. I think it is a pint of creamer. I used coconut creamer instead of whipping cream because of that whole Paleo diet thing... you can use whichever, but the coconut creamer is WAY better for you.
Whisk the creamer into your soup until...
VOILA!

You did it!! You're done!!
The final product is beautiful and delicious! Would make a great appetizer or side item to any meal! Especially on a chilly evening!
Hope you try it and love it! I know I did!

Looks delicious!!
ReplyDeleteJennifer, it was delicious! And it was even better left over! Best of all, I froze most of it for those nights that I really just don't want to make dinner! :)
ReplyDelete